
Checkboxlist/SelectMany layout tweaks
A checkboxlist/SelectMany property will by default render a single vertically aligned list of checkboxes in the Episerver UI. This is fine for most cases, but depending on how many items you have, you might want to separate them into multiple columns.
Here's a little bit of code that lets you do just that. In the example below, I've added a couple of properties which will use a custom attribute named SelectManyExtended. Notice how you can specify the number of columns.
[SelectManyExtended(NumberOfColumns = NumberOfColumns.Two, SelectionFactoryType = typeof(ContactPageSelectionFactory))]
public virtual string People { get; set; }
[SelectManyExtended(NumberOfColumns = NumberOfColumns.Three, SelectionFactoryType = typeof(ContentTypeSelectionFactory))]
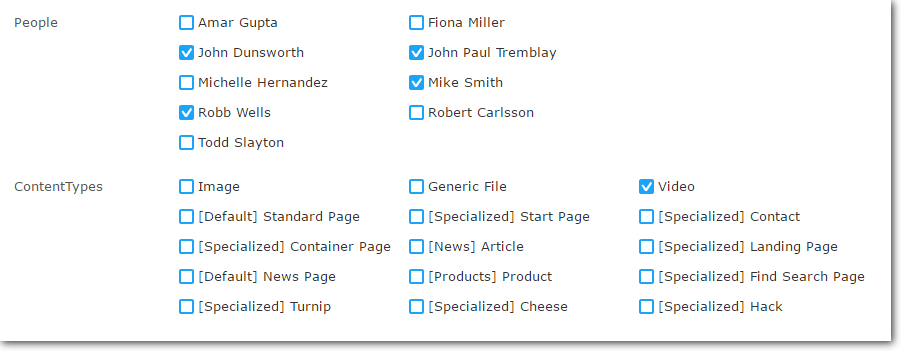
public virtual string ContentTypes { get; set; }This will make the checkbox list render like this:
How does it work?
The code for the SelectManyExtended is based on the standard SelectMany, but with some tweaks (see inline comments):
    [AttributeUsage(AttributeTargets.Property)]
    public class SelectManyExtendedAttribute : Attribute, IMetadataAware
    {
        public virtual Type SelectionFactoryType { get; set; }

        public virtual NumberOfColumns NumberOfColumns { get; set; }

        public void OnMetadataCreated(ModelMetadata metadata)
        {
            var extendedMetadata = metadata as ExtendedMetadata;
            if (extendedMetadata == null)
                return;
            extendedMetadata.ClientEditingClass = "epi-cms/contentediting/editors/CheckBoxListEditor";
            extendedMetadata.SelectionFactoryType = SelectionFactoryType;

            // if we only want show one column, which is standard, we do not have to modify anything
            if(NumberOfColumns == NumberOfColumns.One)
                return;

            // for two columns, the width is set to 600px. 900 for three colums
            string width = NumberOfColumns == NumberOfColumns.Two ? "600px" : "900px";

            extendedMetadata.EditorConfiguration["style"] = "width: " + width;

            // also add a unique css class name so that we do not mess up standard check box lists
            extendedMetadata.EditorConfiguration["class"] = "selectmanyextended";
        }
    }

    public enum NumberOfColumns
    {
        One,
        Two,
        Three,
    }
A little bit of css is needed to make it look right. This should be placed in one of your client resources styles, referred in module.config:
.selectmanyextended .epi-checkboxContainer {
    float:left;
    width:230px;
}
That's it!
Comments